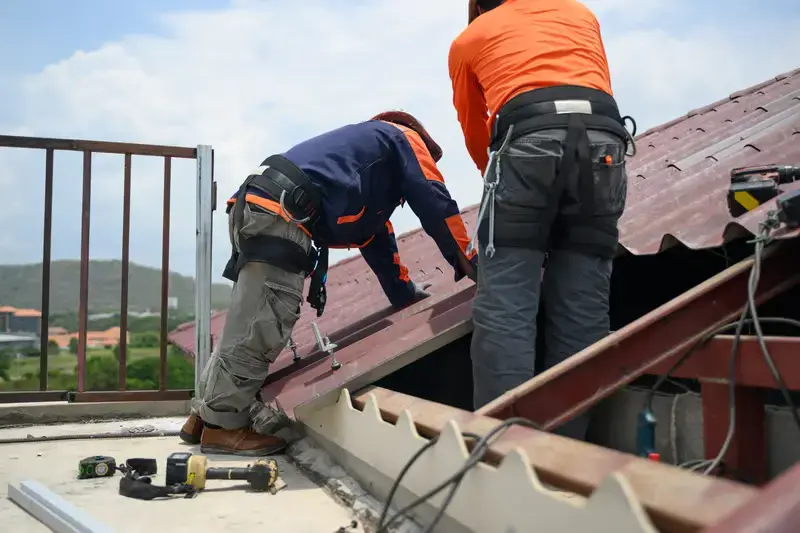

A roof can look perfectly finished from the ground and still have serious installation problems hidden beneath its shingles. A weak roof deck, poorly positioned fasteners, or incorrectly installed flashing can allow moisture into the building long before visible damage appears. That is why a successful roofing project begins with careful preparation rather than simply laying new shingles.
This roofing installs structural guide explains the main stages of a residential asphalt shingle installation, from inspecting the supporting structure to completing the final flashing details. You will learn how roof framing and sheathing affect performance, how underlayment and shingles should be layered, and why water management at roof edges, valleys, walls, and penetrations requires special attention.
The technical principles are useful for homeowners evaluating contractors and professionals planning roofing work. Exact requirements vary by climate, building design, local codes, and product specifications, so the applicable regulations and manufacturer instructions must always guide the installation.
Understanding the Roof Structure Before Installation
A roofing system is more than the visible outer covering. It is an assembly of connected components that transfer loads, control moisture, and protect the interior of the building. Every layer depends on the quality of the one beneath it.
The supporting structure usually includes rafters or roof trusses, roof sheathing, underlayment, flashing, and the selected roof covering. Ventilation components may also form part of the assembly, depending on the roof design. If one component is incorrectly installed, the performance of the entire system can suffer.
A reliable roofing installs structural guide starts with understanding how these components work together. Shingles shed most rainwater, but they are not a substitute for sound decking, correctly installed underlayment, or properly detailed flashing.
Roof Framing and Load Support
Rafters and trusses form the primary structural framework. They support the roof deck and transfer roof loads to the walls and other supporting elements. Their design must account for the building’s dimensions, roofing materials, local weather conditions, and applicable structural requirements.
Before installation, inspect accessible framing for visible sagging, splitting, decay, loose connections, and signs of moisture damage. Pay attention to areas around valleys, ridges, roof openings, and previous repairs. These locations can reveal problems that are not obvious from the exterior.
Do not assume that a roof can support additional materials simply because the existing structure has carried its current covering. Replacing lightweight shingles with heavier materials, adding layers, or installing rooftop equipment can change structural demands. A qualified professional should evaluate any proposed change that affects the roof’s loading.
Roof Deck and Sheathing Condition
Roof sheathing provides the surface to which the roofing assembly is attached. Common materials include plywood and oriented strand board (OSB), although the correct specification depends on the building design and local requirements.
The deck should be sound, properly supported, and sufficiently dry before new materials are installed. Look for soft areas, delamination, swelling, rot, damaged edges, and loose panels. These defects can prevent fasteners from holding correctly and may create uneven surfaces beneath the shingles.
Damaged sections should be repaired or replaced using materials and fastening methods appropriate to the existing structure. Simply covering a deteriorated deck with new underlayment does not correct the underlying problem. The 2024 International Residential Code includes specific sheathing and roof-covering requirements for asphalt shingles.
Preparing the Roof Deck and Supporting Components
Once the roof structure has been assessed, preparation focuses on creating a clean, stable, and suitable surface for the new roofing materials. This stage is often where contractors determine whether the original installation can be removed and replaced without additional structural repairs.
Old shingles, exposed fasteners, loose debris, and damaged underlayment should be removed as required by the selected installation method. A clean deck makes it easier to identify defects and prevents irregularities from affecting the finished surface.
The contractor should also check the roof’s edges, valleys, ridges, and openings. These areas need careful preparation because they involve transitions between different roofing components. A poorly prepared transition can become a water entry point even when the main roof surface is installed correctly.
Checking Roof Slope and Drainage
Roof slope affects which materials can be installed and how water moves across the surface. Asphalt shingles are not suitable for every roof pitch. Under the 2024 International Residential Code, asphalt shingles generally require a minimum slope of 2:12, with special double-underlayment provisions for slopes between 2:12 and 4:12. Local adoption and amendments must be checked before applying these requirements. >
Drainage also deserves attention. Roof valleys should direct water toward the eaves without obstructions, while gutters and downspouts should carry runoff away from the building. Existing drainage problems should be corrected rather than concealed beneath a new roof covering.
Planning Ventilation and Moisture Control
A roofing system must manage moisture from both outside and inside the building. Rainwater protection is essential, but condensation and trapped attic moisture can also damage roof sheathing and framing.
For vented attic designs, intake and exhaust ventilation should be considered together. Intake openings are commonly located near the eaves, while exhaust ventilation may be provided at the ridge or through other approved roof vents. The correct arrangement depends on the roof design and applicable ventilation requirements.
Blocked vents, missing baffles, and poorly balanced ventilation can interfere with airflow. Insulation should not obstruct required ventilation channels. This roofing installs structural guide emphasizes that ventilation is part of roof performance, not an optional finishing detail.
Installing Underlayment and Roof Edge Protection
Underlayment is installed over the prepared roof deck and beneath the shingles. It provides a secondary layer of water protection if moisture passes through the outer covering. It also helps protect the deck during construction, although it should never be treated as a replacement for properly installed shingles and flashing.
Common products include asphalt-saturated felt and synthetic underlayment. Self-adhering polymer-modified bitumen membranes are also used in areas requiring additional protection, such as eaves, valleys, and other vulnerable locations. Material selection should reflect the roof design, climate exposure, deck type, local code, and shingle manufacturer’s instructions.
Underlayment is generally installed from the eaves upward so that upper courses overlap lower courses. This creates a drainage path that directs water toward the roof edge rather than beneath the material. Side laps, end laps, fastening patterns, and exposure requirements must follow the approved product instructions.
The 2024 International Residential Code specifies different underlayment arrangements according to roof slope and other design conditions. For example, its asphalt shingle provisions require two layers on slopes from 2:12 up to 4:12, while slopes of 4:12 or greater generally use a single layer installed with specified overlaps.
Drip edge is another important component. It protects the roof perimeter and helps direct runoff away from the fascia and underlying roof structure. Under the 2024 IRC asphalt shingle provisions, drip edge is required at eaves and rake edges, with different positioning relative to the underlayment at these two locations.
Do not assume that every roof requires identical membrane coverage. Ice barriers, for instance, depend on climate and local code provisions. The correct roofing installs structural guide for a specific property must account for these local conditions rather than apply one generic installation detail everywhere.
Shingle Layering and Correct Fastening Techniques
Shingle installation creates the roof’s primary weather-shedding surface. Each course must overlap the one below it so that water flows down the roof rather than entering exposed joints. The arrangement also affects wind resistance, appearance, and long-term durability.
Before installation begins, the contractor should confirm the shingle type, approved installation pattern, required fasteners, and roof slope compatibility. Different products can have different exposure dimensions, nail zones, sealant locations, and fastening requirements.
Starter Courses and the First Shingle Row
Starter shingles form the first protective course along the eaves and, where specified, the rakes. They help seal the lower edge of the roof covering and support the correct alignment of the first full shingle row.
The starter course should be positioned according to the manufacturer’s instructions. Its adhesive strip and fastening arrangement are important because exposed or incorrectly positioned fasteners can create entry points for wind-driven rain. The first full shingle course must also be aligned carefully to establish a consistent pattern across the roof.
A small alignment error near the eaves can become more noticeable as installation progresses. Experienced installers use chalk lines or other layout references to maintain straight courses and consistent exposure.
Shingle Exposure, Offset, and Nail Placement
Shingle exposure refers to the portion of each shingle visible after the next course has been installed. The correct exposure depends on the product. Similarly, the offset between vertical joints helps prevent continuous water paths through the roof covering.
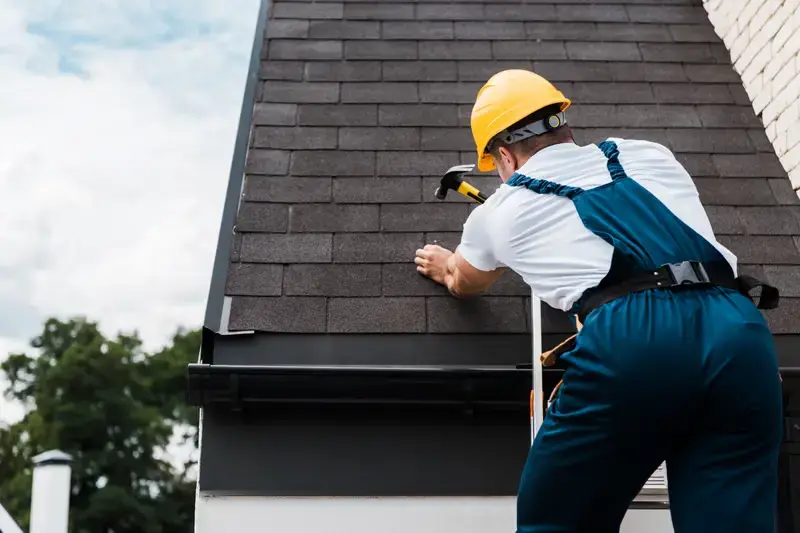
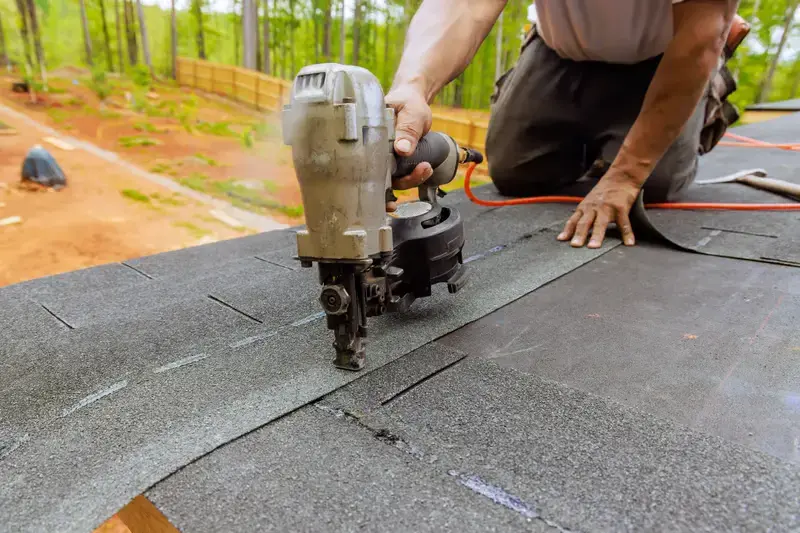
Fastener placement is just as important as shingle alignment. Nails must be driven into the manufacturer’s designated nailing zone, with the correct length and penetration. They should sit flush against the shingle rather than cutting through its surface or remaining raised.
Underdriven nails can interfere with the next course, while overdriven nails may damage the shingle and reduce holding strength. Incorrect nail placement can also affect wind resistance. A contractor should follow the product-specific fastening pattern instead of assuming that every asphalt shingle uses the same number or position of nails.
The 2024 IRC requires asphalt shingles to meet applicable material and wind-resistance standards and to be installed in accordance with approved instructions.
Maintaining Consistent Installation Across the Roof
Shingles should be installed in a controlled sequence that maintains alignment and avoids damaging completed sections. Installers need to account for roof geometry, ridge details, valleys, and penetrations as work progresses.
Cutting and fitting should be planned around these features rather than left until the end. Poorly positioned joints, exposed fasteners, and inconsistent overlaps can compromise the finished surface.
A sound roofing installs structural guide treats shingle layering as a complete system. The quality of the finished roof depends on exposure, offset, fastening, and the correct integration of edge and penetration details.
Flashing Placement Around Valleys, Walls, and Roof Openings
Flashing is designed to control water at locations where the roof covering meets another surface or changes direction. These transitions are especially vulnerable because water can collect, change direction, or encounter gaps that do not exist across a simple roof slope.
Flashing materials commonly include corrosion-resistant metals and approved membrane products. The selection depends on the location, roofing system, exposure, and manufacturer requirements. Flashing must be compatible with adjacent materials and installed so that water is directed back onto the roof surface or safely into the drainage system.
Valley Flashing and Roof Intersections
A roof valley forms where two roof slopes meet. It carries runoff from both sections, so it can experience concentrated water flow. Valley lining should be installed before the surrounding shingles, using an approved open or closed valley method.
In an open valley, metal or another approved lining remains visible. In a closed valley, shingles cover part of the lining according to the selected system. The two methods have different installation details, and they should not be mixed without manufacturer approval.
The 2024 IRC includes specific requirements for valley lining and approved materials under its asphalt shingle provisions.
Step Flashing at Sidewalls and Chimneys
Where a sloped roof meets a vertical wall, step flashing is commonly installed in individual pieces that work with successive shingle courses. Each piece should overlap the one below it so water moves outward onto the roof covering.
The vertical portion must be integrated with the wall’s weather-resistive layer or siding detail. Simply placing metal against the wall and sealing the upper edge with exposed caulk is not a reliable substitute for proper flashing integration.
Chimneys and wider roof penetrations may need additional details, including back pans or crickets where required by the design. Counterflashing protects the upper edge of base flashing and helps prevent water from entering behind it.
Pipe Boots, Skylights, and Other Penetrations
Plumbing vents, exhaust outlets, skylights, and other roof openings interrupt the continuous shingle surface. Each penetration requires a compatible flashing assembly designed for its shape and location.
For example, a vent pipe typically uses a roof flashing boot with a flange integrated beneath the upper shingles and over the lower shingles. The boot must fit the pipe correctly and remain compatible with the roofing material. Skylights require their approved flashing kits and installation details rather than improvised metal patches.
The 2024 IRC requires flashing at roof and wall intersections, changes in roof direction or slope, and around roof openings.
Final Inspection, Common Errors, and Installation Quality
The final inspection should confirm that all parts of the roof work together. A roof can have straight shingle lines and a clean appearance while still containing hidden defects. Inspection should therefore cover the surface, edges, flashing, fastening, and accessible structural components.
Common problems include damaged sheathing left beneath new materials, missing drip edge, incorrect underlayment overlaps, exposed fasteners, poorly fitted pipe boots, and flashing sealed only with surface caulk. Inadequate attic ventilation and blocked drainage paths can also reduce roof performance.
A professional quality check should verify that shingles match the approved product, courses remain aligned, fasteners follow the specified pattern, and flashing details are complete. Gutters and downspouts should be clear, and loose roofing debris should be removed.
Documentation is useful as well. Homeowners should retain product information, installation records, warranty details, permits where applicable, and photographs of concealed components before they are covered. These records can help resolve future maintenance or warranty questions.
The RCABC’s Asphalt Shingle Systems Standard, updated in 2026, organizes technical guidance around supporting structures, roof assembly, underlayment, shingle systems, drainage, and flashing. Its structure reinforces the importance of treating the roof as one coordinated assembly rather than a collection of unrelated materials.
Final Thoughts
A durable roof begins with sound framing and properly prepared sheathing. Underlayment and drip edge provide secondary protection, while correctly aligned shingles create the main water-shedding surface. Flashing then protects the vulnerable transitions around valleys, walls, chimneys, and roof openings.
This roofing installs structural guide shows why installation quality depends on the sequence and compatibility of every component. Following local building requirements, approved product instructions, and sound workmanship helps reduce leaks and premature roof failure. A qualified roofing professional should inspect structural concerns and complete work that involves roof access, fall exposure, or technical repairs.
FAQs
1. How long does a typical asphalt shingle roof installation take?
Many residential projects take one to several days, depending on roof size, pitch, weather, material removal, and the condition of the deck. Repairs to framing or sheathing can extend the schedule. Ask the contractor for a project-specific timeline before work begins.
2. Can new shingles be installed over an existing roof?
Some jurisdictions and roofing systems permit an additional layer, but this is not suitable for every roof. Existing damage, excessive layers, poor ventilation, or uneven surfaces may require full removal. Check local code and manufacturer requirements before deciding.
3. What is the most important part of roof flashing?
Correct integration is more important than simply using metal or sealant. Flashing must overlap in the direction of water flow and connect properly with shingles and wall weather barriers. Valleys, sidewalls, chimneys, and penetrations need details suited to their locations.
4. How can I tell whether my roof deck needs replacement?
Warning signs include soft or spongy areas, visible rot, swollen or delaminated panels, sagging, and water staining. A contractor should inspect the deck after removing the old covering. Structural damage may require assessment by a qualified building professional.
5. Why do roofing manufacturers’ installation instructions matter?
Shingles and underlayment products can differ in nail placement, exposure, slope limits, fastening, and flashing details. Following the approved instructions helps maintain system performance and warranty eligibility. Local building codes may impose additional requirements that must also be followed.