
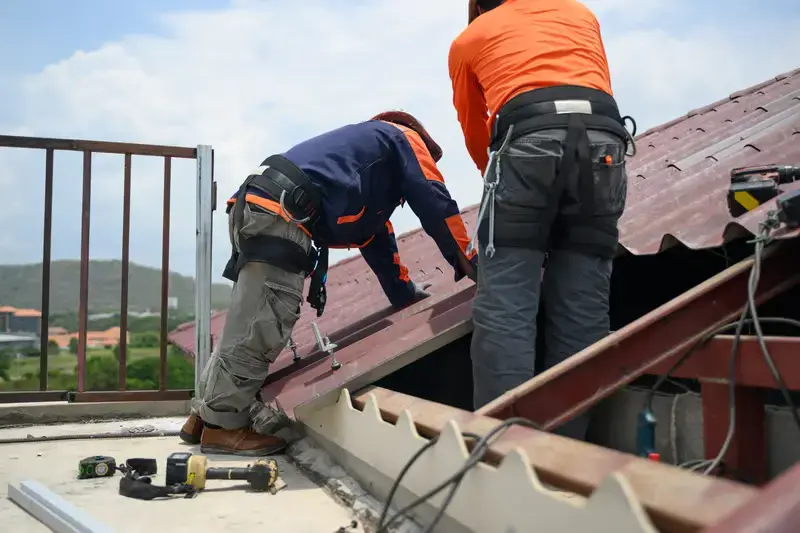
A modern roofing installation involves much more than placing new shingles, metal panels, or membrane materials over a building. It is a coordinated construction process that protects the structure, manages water, supports energy performance, and meets safety requirements. Every stage matters, from inspecting the roof deck to securing the final flashing details.
Poor preparation can create problems that remain hidden until the building experiences heavy rain, strong winds, or seasonal temperature changes. A roof may look finished while having weak attachment points, inadequate ventilation, or poorly sealed transitions. These defects can shorten its service life and lead to expensive repairs.
Understanding modern roofing installs steps helps property owners, contractors, and project managers evaluate the work more effectively. A reliable installation combines structural assessment, suitable materials, controlled workmanship, and documented safety procedures. The goal is not simply to complete the roof. It is to build a system that performs reliably under real conditions.
Structural Assessment Before Installation
The first stage is understanding what the existing building can safely support. A roofing contractor should inspect the roof structure before selecting materials or scheduling installation. This assessment helps identify defects that could affect the new system.
The inspection should cover the roof deck, rafters, trusses, joists, supports, existing coverings, and areas where water may have entered. Any visible sagging, cracking, corrosion, rot, or separation requires further investigation.
Evaluate the Roof Deck and Supporting Structure
The roof deck provides the surface to which many roofing components are attached. It must be sufficiently strong, stable, and suitable for the chosen system. Damaged plywood, deteriorated boards, loose fasteners, and moisture-weakened sections should not simply be covered with new materials.
The supporting structure also needs attention. Additional roofing layers can increase dead loads, particularly when replacing lightweight materials with heavier tiles or other products. Contractors should verify that the structure can accommodate the proposed assembly, including insulation, underlayment, panels, and any additional equipment.
Where structural damage is suspected, a qualified structural professional may need to assess the building. This is especially important for older properties, buildings with previous roof modifications, and structures exposed to significant snow or wind loads.
Check Drainage, Roof Slope, and Existing Defects
Roof geometry affects how water moves across the surface. Contractors should examine slopes, valleys, drainage paths, gutters, downspouts, and areas where water could collect.
Flat and low-slope roofs require particular attention because they depend on carefully designed drainage systems. Ponding water can increase structural loads and place additional stress on seams and waterproofing layers.
The inspection should also identify previous leaks, damaged flashing, blocked drainage outlets, and signs of condensation. These problems should be corrected at their source rather than concealed beneath the new roofing system.
Select Materials Based on Building Requirements
Material selection is a technical decision, not simply an aesthetic one. A roofing product should match the building’s structure, climate, roof slope, maintenance expectations, and local building requirements.
For example, a metal roofing system may suit a building exposed to frequent rain, while a low-slope commercial roof may require a specialized membrane assembly. Clay or concrete tiles can offer durability, but their weight must be considered during structural planning.
Compare Roofing System Options
Common modern roofing materials include asphalt shingles, standing-seam metal, concrete and clay tiles, synthetic roofing products, and single-ply membranes such as TPO, PVC, and EPDM.
Each system has different installation requirements. Metal panels depend on suitable fastening or concealed clips, while membrane systems require compatible seams, adhesives, or mechanical attachment. Shingle systems need correct fastening patterns and underlayment arrangements.
Contractors should evaluate complete system compatibility rather than comparing individual products in isolation. A high-quality surface material cannot compensate for an unsuitable underlayment, poorly designed flashing, or inadequate ventilation.
Consider Weather and Building Performance
Climate conditions influence material performance. High winds require appropriate attachment methods and edge detailing. Buildings in areas with heavy rainfall need reliable drainage and waterproof transitions. Properties exposed to intense sunlight may benefit from roofing products designed to manage solar heat.
Energy performance also deserves attention. Roof color, insulation, ventilation, and reflective properties can influence indoor temperatures and cooling demand. However, reflective roofing alone does not solve poor insulation or ventilation problems.
The best modern roofing installs steps account for the complete building envelope. Contractors should consider how the roof interacts with walls, attic spaces, insulation, air barriers, and mechanical systems.
Prepare the Roof Surface and Work Area
Once the assessment and material decisions are complete, contractors can prepare the site. Proper preparation reduces installation errors and protects the building during construction.
Before work begins, the contractor should establish material storage areas, waste disposal arrangements, equipment access, and protection for landscaping and nearby property. The installation team should also confirm weather conditions and identify how the building will remain protected if the work is interrupted.
Remove Existing Materials Carefully
If the project requires roof replacement, existing coverings may need to be removed. This process should be controlled so workers do not damage the roof deck, structural supports, gutters, or nearby building components.
Removal also creates an opportunity to inspect concealed areas. Water damage, deteriorated decking, old flashing defects, and previous repairs may become visible only after the existing materials are taken away.
Contractors should establish procedures for unexpected discoveries. For example, if significant rot appears after removal, installation should pause while the affected area is assessed and repaired. Covering the defect would transfer the problem into the new roofing system.
Repair and Clean the Deck
The exposed deck should be checked for stability, proper fastening, and surface condition. Damaged sections should be replaced with suitable materials, and loose boards or protruding fasteners should be addressed.
The surface must also be clean and prepared according to the roofing manufacturer’s instructions. Dust, debris, moisture, and uneven areas can interfere with underlayment, adhesives, and other components.
These preparation tasks may seem less visible than the finished roof, but they strongly influence long-term performance.
Install Underlayment and Waterproofing Components
Underlayment provides an additional protective layer beneath many roofing materials. Its purpose is to help manage water that passes beneath the outer covering and protect the deck during certain weather conditions.
The type of underlayment depends on the roofing system, climate, roof slope, and applicable installation requirements. Synthetic underlayments, asphalt-based products, and self-adhered membranes have different characteristics and application methods.
Follow Correct Overlap and Attachment Requirements
Underlayment should be installed according to the manufacturer’s specifications. This includes the correct direction of installation, overlap dimensions, fastening methods, and treatment around roof penetrations.
Improper overlaps can allow water to move beneath the protective layer. Loose material may wrinkle or shift, creating problems when the finished roofing is installed.
Self-adhered products also require suitable surface conditions. Dust, moisture, temperature, and substrate compatibility can affect adhesion. Installers should not assume that every membrane performs equally well on every deck.
Protect Vulnerable Roof Areas
Valleys, eaves, ridges, roof-to-wall intersections, and penetrations need special attention. These areas experience more complicated water movement than broad roof surfaces.
Ice and water protection may be required in vulnerable locations depending on climate and local codes. Flashing and waterproofing details should be coordinated with the selected roofing system.
A useful principle in modern roofing installs steps is to treat transitions as critical design areas. Many roof leaks develop where different building components meet, rather than in the middle of an otherwise correctly installed roof surface.
Install the Primary Roofing System Correctly
With the deck prepared and protective layers installed, contractors can begin placing the primary roofing material. The exact process varies by product, but every system requires accurate layout, suitable fastening, and careful detailing.
Installers should follow the manufacturer’s technical instructions and approved project specifications. Shortcuts in spacing, fastening, alignment, or seam preparation can reduce the roof’s resistance to wind and water.
Maintain Correct Layout and Fastening
Shingles require correct starter courses, alignment, fastening locations, and exposure. Metal panels need accurate spacing, appropriate clips or fasteners, and suitable allowance for thermal movement where the system requires it.
Tile systems need proper support and fastening for the roof’s slope and expected exposure. Membrane roofing requires compatible attachment methods and properly prepared seams.
Fasteners should not be overdriven, underdriven, or placed outside the specified locations. A fastener that damages a shingle or fails to secure a panel correctly can become a weak point during severe weather.
Pay Attention to Seams and Roof Penetrations
Roof penetrations include vents, pipes, skylights, exhaust outlets, and other equipment. Each penetration creates an interruption in the roofing surface and needs compatible flashing or sealing details.
Membrane seams should be prepared and joined according to the system’s requirements. Metal roofing joints need appropriate closures and compatible sealants where specified.
These details require trained workmanship. Applying extra sealant is not a substitute for correct flashing design or proper mechanical connections. Sealants can deteriorate over time, so the roof should rely on a complete, properly integrated system.
Complete Flashing, Ventilation, and Drainage Details
A roofing system performs as well as its weakest transition. Flashing, ventilation, and drainage components are therefore essential parts of the installation, not finishing touches.
Install Flashing at Critical Junctions
Flashing directs water away from vulnerable areas. It is commonly installed around chimneys, skylights, valleys, roof edges, walls, and other penetrations.
The material and installation method should be compatible with the roofing product. Incorrectly layered flashing can direct water underneath the roof covering instead of away from it.
Contractors should also pay attention to counterflashing and wall connections. These details need to work together so water cannot enter behind the roof assembly.
Design Ventilation as a Complete System
For roof assemblies that use attic ventilation, intake and exhaust airflow should be planned together. Intake openings may be located near the eaves, while exhaust ventilation may be positioned near the ridge or other approved high points.
Blocking intake vents with insulation or providing inadequate exhaust capacity can undermine the system. Ventilation requirements also vary by roof design and climate. Some modern roof assemblies use unvented configurations, which require specific moisture and thermal-control strategies.
The goal is to manage heat and moisture without creating unintended air leakage or condensation problems. Contractors should follow applicable building codes and the assembly manufacturer’s instructions.
Confirm Drainage Performance
Gutters, downspouts, drains, scuppers, and roof slopes should work as a coordinated drainage system. Outlets must remain clear, and water should move toward designated drainage points.
On low-slope roofs, drainage design is particularly important. Contractors should verify that outlets are correctly positioned and that the finished surface does not create unintended water collection areas.
Follow Essential Roofing Safety Protocols
Roofing work exposes workers to serious hazards. Falls, falling objects, electrical contact, heat stress, fire risks, and equipment accidents can cause severe injuries. Safety must therefore be part of every stage of the project.
The Occupational Safety and Health Administration (OSHA) identifies fall protection as a major requirement for construction work. Its construction standards generally require protection for workers exposed to falls of six feet or more, subject to the specific conditions and provisions of the applicable standard. Requirements vary by jurisdiction, so contractors must follow the rules governing their project.
Requirements with guidance for use+1
Use Appropriate Fall Protection
Workers should use suitable fall protection based on roof height, slope, work conditions, and local regulations. Depending on the project, this may include guardrails, safety nets, personal fall arrest systems, or other approved protection.
Personal fall arrest systems require more than wearing a harness. Workers need suitable anchor points, compatible equipment, proper fitting, and training. The system must be planned so that a fall can be arrested safely without the worker striking a lower surface.
A rescue plan is also necessary. If someone falls and remains suspended in a harness, prompt rescue may be essential. Teams should understand the procedure before work begins rather than trying to develop one during an emergency.
Control Ladder and Equipment Hazards
Ladders should be inspected before use and placed on stable surfaces. They must be positioned correctly, secured where necessary, and used according to their design and capacity.
Materials and tools should be stored safely to prevent objects from sliding or falling from the roof. Ground-level workers and visitors should be kept away from hazardous work zones.
Powered equipment, cutting tools, and lifting devices should be operated by trained personnel. Electrical lines and overhead hazards must be identified before equipment or long materials are moved.
Monitor Weather and Worker Conditions
Roofing work should not continue when conditions make the surface unsafe. Rain, ice, high winds, lightning, and extreme heat can increase the likelihood of accidents.
Heat management is especially important on roofs because exposed surfaces can become significantly hotter than surrounding areas. Employers should provide appropriate drinking water, rest opportunities, shade where possible, and procedures for recognizing heat-related illness.
Safety briefings should be held before work starts and repeated when conditions or tasks change. Workers should have clear authority to stop unsafe activities.
Inspect, Test, and Document the Finished Roof
A completed installation should never be accepted based only on appearance. The final inspection needs to confirm that the roof meets project specifications, manufacturer instructions, and applicable building requirements.
Contractors should inspect the entire surface, including areas that are difficult to see from the ground. This includes edges, ridges, valleys, flashing, penetrations, seams, fasteners, and drainage outlets.
Check Workmanship and System Performance
The inspection should identify loose materials, exposed fasteners, damaged panels, incorrect overlaps, incomplete flashing, and signs of poor workmanship.
For certain low-slope roofing systems, additional quality-control procedures may be appropriate. These can include seam inspections, adhesion checks, or other tests specified by the manufacturer and project requirements.
Where the project involves structural repairs or significant modifications, required inspections and approvals should also be completed before the work is closed out.
Keep Installation Records
Documentation protects both the property owner and the contractor. Keep records of the materials used, product specifications, installation dates, inspection results, warranties, and any approved changes made during construction.
Photographs of concealed components can also be useful. Images of repaired decking, underlayment, flashing, and other covered details provide a record of work that cannot be easily inspected after completion.
A maintenance plan should explain how often the roof needs inspection and which conditions require attention. Regular checks after severe weather can help identify loose components, blocked drainage, and early signs of damage.
Conclusion
Modern roofing installs steps involve a coordinated process that begins with structural assessment and ends with inspection, documentation, and maintenance planning. Material selection, deck preparation, waterproofing, correct fastening, flashing, ventilation, and drainage all contribute to the roof’s long-term performance.
Safety is equally important. Fall protection, equipment controls, weather monitoring, worker training, and emergency planning should be established before installation begins and maintained throughout the project.
The strongest roofing results come from treating the roof as a complete building system rather than a surface covering. When contractors follow suitable technical specifications, address structural challenges early, and maintain consistent safety standards, property owners gain a more dependable roof and greater confidence in the quality of the work.